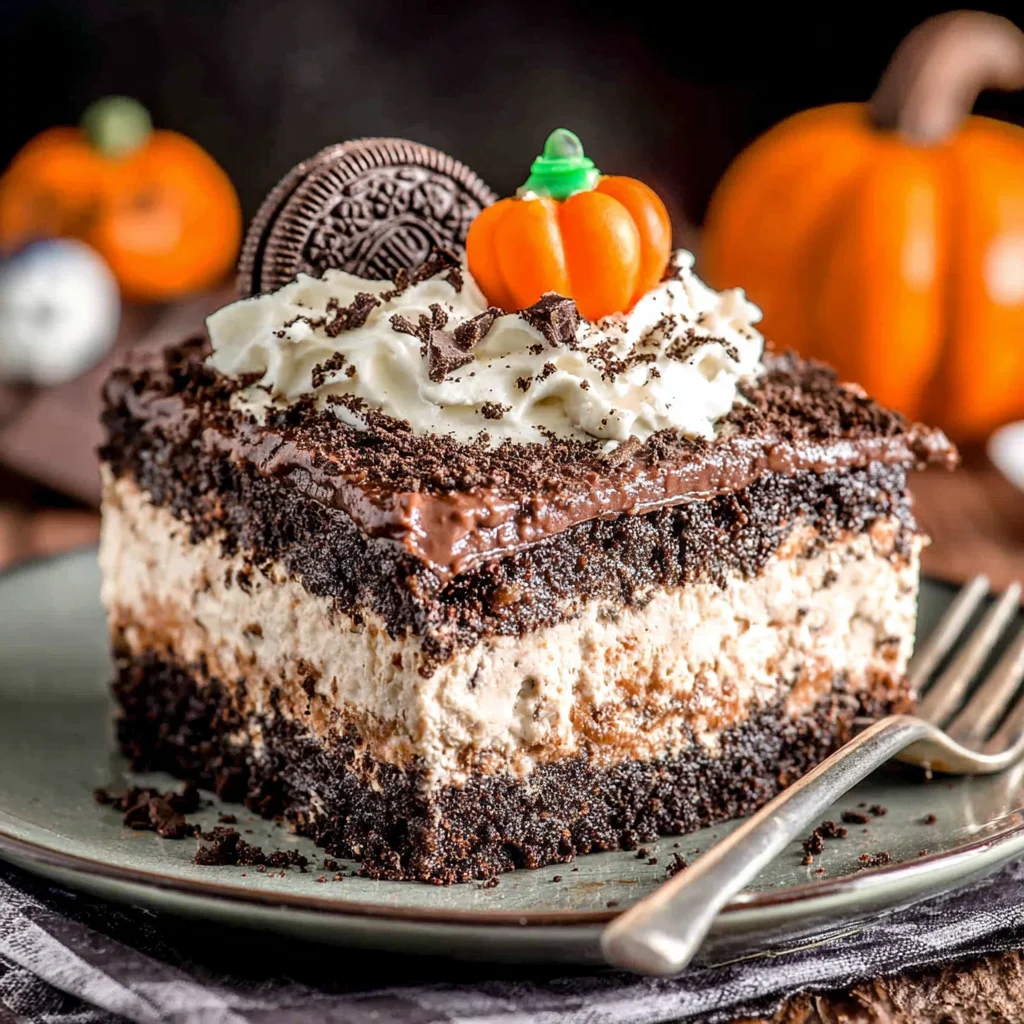
Get ready to dig into a frightfully fun dessert that’s as easy to make as it is delicious! This Halloween Dirt Cake is the perfect no-bake treat for your spooky celebrations. Imagine layers of rich chocolate cookie crumbs resembling dirt, creamy pudding and cream cheese “worms” squirming beneath a creepy crawly garnish. It’s a showstopper that’s surprisingly simple to whip up, even for novice bakers. This recipe is perfect for Halloween parties, family gatherings, or just a fun treat to enjoy on a chilly autumn evening. Forget about complicated baking; this Halloween Dirt Cake offers a wonderfully decadent experience without the fuss. Whether you’re a seasoned baker or a kitchen newbie, this recipe guarantees a deliciously spooky success. Prepare for compliments and delighted screams – this Halloween Dirt Cake will be the star of your spooky spread!
Why You’ll Love This Halloween Dirt Cake Recipe
This Halloween Dirt Cake recipe isn’t just about the spooky presentation; it’s about the delightful simplicity and the incredible taste. Here’s why you’ll adore making (and eating!) this creepy-crawly creation:
- No-Bake Delight: Forget oven preheating and baking times. This recipe requires no baking, making it perfect for a quick and easy dessert, especially when you’re busy with Halloween preparations.
- Easy Assembly: The layering process is straightforward and incredibly satisfying. You’ll be amazed at how quickly this spooky masterpiece comes together.
- Customizable Decorations: Unleash your creativity! This recipe is a blank canvas for your Halloween decorating skills. Add gummy worms, plastic spiders, chocolate shavings, or any other spooky sweets you desire. Make it your own spooky creation!
- Crowd-Pleaser: This Halloween Dirt Cake is guaranteed to be a hit with both kids and adults. It’s a fun, festive, and undeniably delicious dessert that everyone will enjoy. Check out our other delicious recipes on Cocina Facilita for more inspiration.
- Make-Ahead Friendly: Prepare this cake a day or two in advance and store it in the refrigerator. This allows you to focus on other Halloween festivities without last-minute dessert stress.
- Uses Pantry Staples: Most of the ingredients are common pantry items, so you’re likely to have many already on hand.
Why You Should Try This Halloween Dirt Cake Recipe
Beyond the ease and deliciousness, there are compelling reasons to choose this Halloween Dirt Cake recipe over others:
- Unique and Memorable: It’s not your average Halloween dessert. This recipe offers a unique twist on classic flavors and presentation, creating a memorable treat for your guests.
- Impressive Presentation: The layered effect, combined with the spooky decorations, creates an impressive dessert that will wow your guests. It’s practically a work of art!
- Perfect for All Skill Levels: Whether you’re a baking pro or a complete novice, this recipe is designed for success. The simple instructions and straightforward steps make it accessible to everyone.
- Adaptable to Dietary Needs: With a few simple substitutions, you can easily adapt this recipe to suit various dietary needs, including gluten-free or vegan options (more on this in the tips section below!). For another delicious and easy meal option, try our Easy Black Pepper Chicken.
- Cost-Effective: The ingredients are relatively inexpensive, making this a budget-friendly dessert option for large gatherings.
- Stress-Free Baking: Avoid the stress of complicated baking with this easy no-bake option. You’ll save time and energy while still creating a stunning dessert.
Ingredients and Necessary Utensils for Your Halloween Dirt Cake
Gathering your ingredients and utensils beforehand will ensure a smooth and efficient baking process. Let’s get started!
Ingredients:
- 1 package (16 ounces) chocolate sandwich cookies (Oreos are perfect!)
- 1/2 cup (1 stick) unsalted butter, softened (essential for creamy texture)
- 8 ounces cream cheese, softened (room temperature is key for smooth mixing)
- 1 cup powdered sugar (for sweetness and creamy texture)
- 1 teaspoon vanilla extract (enhances the flavor profile)
- 1 cup cold heavy cream (for whipping into fluffy clouds)
- 1/2 cup chocolate pudding (instant mix works perfectly)
- 1/4 cup milk (for making the pudding creamy)
- Gummy worms (the star of the spooky show!)
- Plastic spiders (add extra creepy vibes)
- Chocolate shavings (optional, for extra richness and decoration)
Utensils:
- Food processor or zip-top bag and rolling pin (for crushing cookies)
- Mixing bowls (at least two, for separate ingredients)
- Electric mixer (handheld or stand mixer) (for whipping cream and mixing filling)
- Rubber spatula or spoon (for scraping down the sides of the bowl)
- Measuring cups and spoons (for accurate ingredient measurements)
- 9×13 inch baking dish or trifle bowl (to assemble your Halloween Dirt Cake)
- Serving spoon or spatula (for serving)
Having these utensils prepared in advance ensures a seamless baking experience. For extra tips and tricks, you might want to browse through our other recipes, like our Easy Lemon Butter Garlic Pasta for pasta making tips.
Detailed Steps for Making Your Spooky Halloween Dirt Cake
Let’s create this frighteningly delicious Halloween Dirt Cake! Follow these simple steps for a guaranteed spooky success.
- Prepare the “Dirt”: Crush the chocolate sandwich cookies into fine crumbs using a food processor or by placing them in a zip-top bag and crushing them with a rolling pin. **Make sure the cookies are finely crushed for a realistic “dirt” texture.**
- Combine Cookie Crumbs and Butter: In a mixing bowl, combine the crushed cookie crumbs with the softened butter. Mix thoroughly until the crumbs are evenly moistened. This mixture forms the base of your spooky landscape.
- Prepare the Cream Cheese Filling: In a separate mixing bowl, beat the softened cream cheese with an electric mixer until smooth and creamy. Gradually add the powdered sugar, beating until well combined. **Ensure that the cream cheese is at room temperature for optimal creaminess.** Stir in the vanilla extract.
- Whip the Heavy Cream: In a clean mixing bowl, whip the cold heavy cream with an electric mixer until stiff peaks form. This will add lightness and airiness to your dessert. **Make sure the bowl and beaters are completely clean and dry for optimal whipping.**
- Prepare the Chocolate Pudding: Prepare the instant chocolate pudding according to the package directions, using the specified amount of milk. Let it sit for a few minutes to thicken slightly.
- Assemble the Layers: In your prepared baking dish, start by pressing half of the cookie crumb mixture into the bottom to form the base layer. Next, spread half of the cream cheese filling evenly over the cookie crumb layer. Gently fold in half of the whipped cream into the chocolate pudding and spread this mixture over the cream cheese layer. Repeat the layers: remaining cookie crumbs, remaining cream cheese filling, and the remaining chocolate pudding and whipped cream mixture.
- Decorate and Chill: Decorate your Halloween Dirt Cake with gummy worms, plastic spiders, and chocolate shavings. **Use your creativity here!** Refrigerate the cake for at least 2 hours, or preferably overnight, to allow the flavors to meld and the dessert to set completely. For more inspiration on dessert recipes, check out our Apple Crisp Mini Cheesecakes recipe.
- Serve and Enjoy: Once chilled, slice and serve your spooky creation. Enjoy the frighteningly delicious treat!
Tips and Variations for Your Halloween Dirt Cake
Here are some tips and variations to elevate your Halloween Dirt Cake experience:
- Gluten-Free Option: Use gluten-free chocolate sandwich cookies to make this recipe gluten-free.
- Vegan Option: Substitute vegan cream cheese and whipped topping for the dairy versions. Use vegan chocolate pudding as well.
- Flavor Variations: Experiment with different cookie flavors (like peanut butter or oatmeal raisin) for a unique twist.
- Extra Decoration Ideas: Get creative with your decorations! Use candy corn, sprinkles, mini chocolate chips, or even edible glitter.
- Avoid Overmixing: Overmixing the whipped cream can cause it to become grainy. Mix until just combined.
- Room Temperature Ingredients: Make sure your butter and cream cheese are softened to room temperature for easy mixing and a smoother texture. For a savory dish, you may want to look at our Creamy Butternut Squash Soup recipe.
- Chill Time is Key: Allow sufficient chilling time for the cake to set properly. This will prevent a messy and unappetizing result.
Nutritional Values and Benefits of Halloween Dirt Cake Ingredients
While Halloween Dirt Cake is a treat, let’s explore the nutritional aspects of its ingredients:
A serving of Halloween Dirt Cake (approximately 1/8 of the 9×13 inch cake) will contain a variable amount of calories, protein, fat, and carbohydrates, depending on the specific brands of cookies, cream cheese, and pudding used. It’s best to use a nutrition calculator that allows you to enter your specific brand details for an accurate estimate.
Benefits of the Ingredients:
- Chocolate: Contains antioxidants that may have health benefits. Choose dark chocolate for even more antioxidants.
- Dairy: Provides calcium and protein. Look for low-fat or reduced-fat options.
- Cream Cheese: Contains protein and some calcium.
- Cookies: While not a major nutritional source, they do provide some energy.
Remember that this is a dessert and should be enjoyed in moderation as part of a balanced diet. If you are watching your weight, consider reducing the sugar or using sugar substitutes. Check out some of our healthier options like our Fall Fruit Salad.
FAQs
Can I make this Halloween Dirt Cake ahead of time?
What kind of cookies can I use for this recipe?
Is this Halloween Dirt Cake recipe gluten-free?
How long does the Halloween Dirt Cake need to chill?
Can I use homemade pudding instead of instant pudding?
Conclusion: Dig into Your Spooktacular Halloween Dirt Cake!
This Halloween Dirt Cake recipe is a guaranteed winner for any Halloween gathering. Its simple preparation, impressive presentation, and delicious flavors make it a perfect spooky dessert choice. Remember to have fun decorating and unleash your creativity! Don’t forget to share your creations with us – post pictures of your Halloween Dirt Cake on social media and tag us! Let us know what you thought of this recipe in the comments below. And don’t forget to check out our other delightful recipes on Cocina Facilita for more culinary inspiration. Happy haunting and happy baking!
For more delicious Halloween dessert inspiration, check out our Pinterest board: Cocina Facilita’s Halloween Treats.

Spooky Delicious Halloween Dirt Cake
Ingredients
Equipment
Method
- Crush chocolate sandwich cookies into fine crumbs using a food processor or by placing them in a zip-top bag and crushing with a rolling pin.
- In a medium bowl, cream together the softened butter and cream cheese until smooth.
- Beat in the powdered sugar and vanilla extract until well combined and fluffy.
- In a separate bowl, whisk together the chocolate pudding mix and milk until smooth.
- In a chilled bowl, whip the heavy cream until stiff peaks form. Gently fold the whipped cream into the cream cheese mixture.
- Layer the ingredients in a 9x13 inch baking dish: start with half the cookie crumbs, followed by the chocolate pudding, then the cream cheese frosting, and finally the remaining cookie crumbs.
- Decorate with gummy worms, plastic spiders, and chocolate shavings (optional). Refrigerate for at least 2 hours before serving.