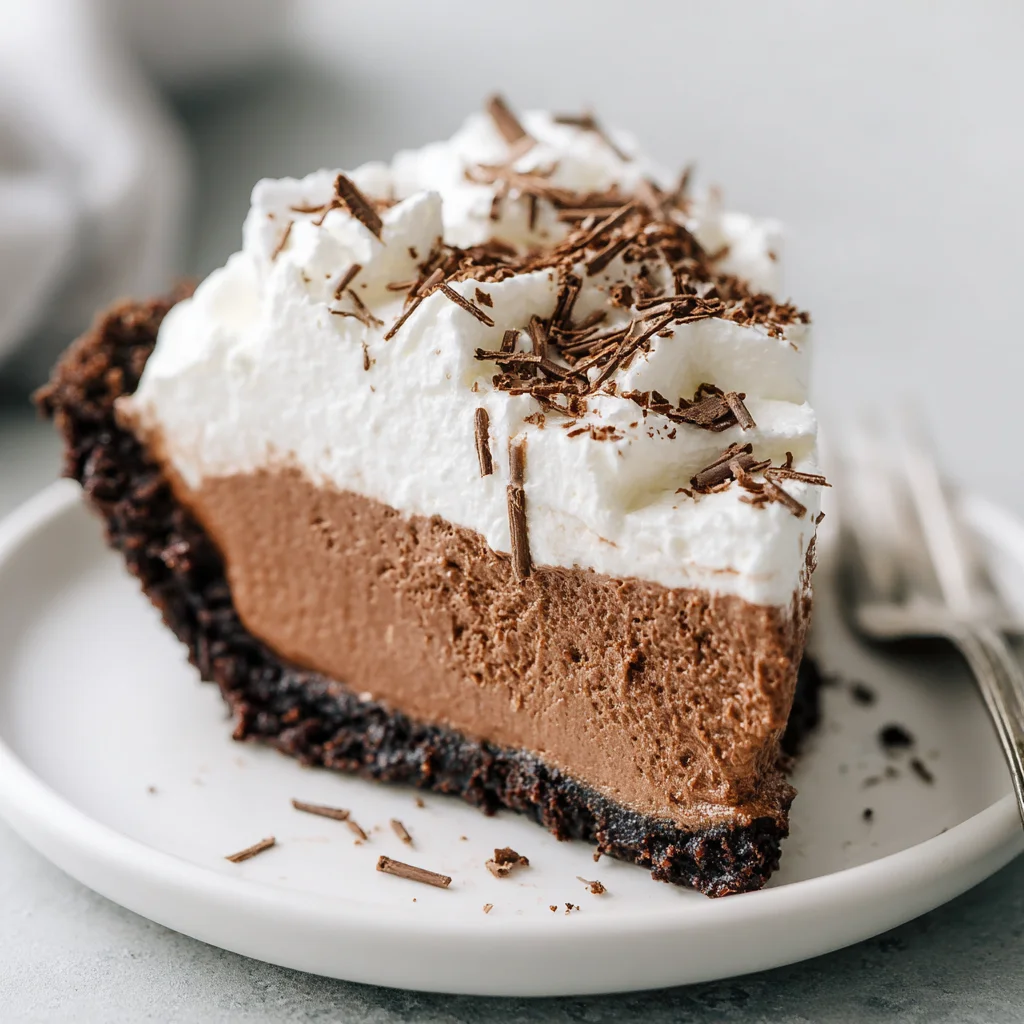
If there is one dessert that perfectly encapsulates luxurious indulgence, it is the classic, impossibly smooth Chocolate Silk Pie Recipe. This pie is not just a dessert; it’s an experience a cool, rich filling resting on a crisp Graham cracker base, crowned with airy clouds of homemade whipped cream. Unlike many baked chocolate pies, the “silk” in this recipe comes from a light, buttery mousse base that is whipped to perfection, resulting in a texture so fine it melts instantly on the tongue.
Forget dry, dense chocolate pies. Our version of this classic relies on high-quality ingredients and a few simple, crucial techniques that guarantee a flawless, airy filling every time. It’s the perfect make-ahead centerpiece for any holiday gathering, dinner party, or simply a weekend treat when a serious chocolate craving hits. This comprehensive guide will walk you through achieving that signature feather-light texture and rich, deep chocolate flavor, cementing this Chocolate Silk Pie Recipe as a staple in your dessert repertoire.
Why You’ll Absolutely Love This Homemade Chocolate Silk Pie Recipe
The allure of a perfect Chocolate Silk Pie Recipe lies in its harmonious contrasts. You get the crunch and chew of the buttery crust paired with a filling that is utterly weightless, yet profoundly flavorful. If you are seeking a recipe that balances ease of assembly with truly impressive results, look no further. This recipe bypasses the need for complicated tempering or challenging baking techniques, focusing instead on technique in the mixing bowl.
The Textural Triumph: Achieving True “Silk”
What sets this particular Chocolate Silk Pie Recipe apart is its magnificent texture. Many homemade versions can end up feeling dense or even slightly gritty. Our method involves intensely whipping the butter and sugar mixture a technique often referred to as “creaming” until it is pale and nearly white. When the eggs are incorporated slowly and beaten for a full minute each, they emulsify the mixture, trapping microscopic air bubbles that are the secret to that ethereal, silky mouthfeel. The final filling, while rich due to the high butter content, should feel light and airy, almost like a chilled chocolate cloud.
- No-Bake Filling: Once the crust is baked and cooled, the rest of the magic happens in your mixer. No need to worry about the filling cracking or sinking in the oven.
- Intense Chocolate Flavor: By using good quality semi-sweet chocolate, we ensure the flavor is deep and complex, not just sweet. The bitterness of the dark chocolate balances the richness of the butter perfectly.
- The Perfect Graham Cracker Base: The contrast between the baked, slightly caramelized Graham cracker crust and the cold, creamy filling is essential. It provides the necessary structural support and a hint of cinnamon warmth.
Furthermore, the high yield of 8 generous servings makes this dessert economical and excellent for feeding a crowd. It’s a guaranteed crowd-pleaser that often garners comments like, “I can’t believe this is homemade!” The simple yet elegant presentation, especially when topped with freshly whipped cream and delicate chocolate shavings, transforms this dessert into a visual masterpiece. For more inspiration on show-stopping desserts, you might want to explore my dessert board on Pinterest, where I showcase recipes that are both impressive and easy to execute. This commitment to simple luxury is why this Chocolate Silk Pie Recipe remains a favorite.
Essential Reasons Why This Chocolate Silk Pie Recipe Belongs in Your Kitchen
While the taste and texture are undeniable draws, the practicality and versatility of this Chocolate Silk Pie Recipe solidify its place as a must-try. It solves many common dessert dilemmas, particularly when entertaining or looking for a stress-free yet decadent option. This is the ultimate make-ahead dessert, drastically reducing your day-of kitchen stress.
The Power of Preparation and Planning
The mandatory chill time of 4 hours (or better yet, overnight) for the Chocolate Silk Pie Recipe means you can assemble the entire pie one or two days before your event. This completely eliminates the last-minute scramble associated with hot desserts. The filling benefits immensely from extended chilling; the flavors deepen, and the texture becomes perfectly firm, allowing for clean, beautiful slices. Simply add the whipped cream topping just before serving, and you’re ready to go.
Focus on Safety: Using Pasteurized Eggs
A crucial element of traditional silk pie filling is the use of raw eggs, which are necessary to achieve that signature light, airy lift. However, because this pie is not cooked, egg safety is paramount. Our recipe highly recommends the use of pasteurized eggs. Pasteurization involves heating the eggs just enough to kill any potential bacteria without actually cooking them, making them safe for consumption in raw preparations like this chocolate mousse filling. This simple substitution ensures that you can enjoy the classic texture of a real Chocolate Silk Pie Recipe without any safety concerns. This commitment to safety and quality is essential for any modern baker.
If you are looking for other desserts that are easy to prepare ahead of time, similar to this silk pie, consider my recipe for Oreo Fudge, the Ultimate No-Bake Dessert Recipe, which is another excellent option for stress-free entertaining. Knowing you have a show-stopping dessert already chilled and ready to serve makes hosting much more enjoyable.
A Note on Ingredient Quality
In a recipe with so few primary ingredients (butter, chocolate, sugar), the quality of each component shines through. Using a good quality semi-sweet chocolate (around 50-60% cocoa solids) is non-negotiable. It provides the necessary depth of flavor. Similarly, using high-quality butter that is truly softened to room temperature is the foundation for a flawless filling. When you invest in quality ingredients for your Chocolate Silk Pie Recipe, the resulting flavor is exponentially better than any box mix or store-bought equivalent.
Ingredients and Necessary Utensils for the Perfect Chocolate Silk Pie Recipe
Success in making this Chocolate Silk Pie Recipe begins with proper preparation. Ensure all your ingredients are measured precisely and that your perishable items (like butter and cream) are handled at the right temperatures. The required yield is 8 servings, and the prep time is about 45 minutes, not including the crucial chill time.
Detailed Ingredients List
Temperature and quality are key, especially for the butter and chocolate, which form the base of the silky filling.
For the Crisp Graham Cracker Crust
- 1 1/2 cups Graham cracker crumbs: Approximately 12 full sheets, finely processed. You can use a food processor or crush them manually in a bag.
- 1/4 cup granulated sugar: Provides a hint of sweetness and helps the crust set.
- 6 tablespoons unsalted butter, melted: Essential for binding the crumbs and creating a sturdy base.
For the Decadent Chocolate Silk Filling
- 4 ounces good quality semi-sweet chocolate: Finely chopped. Use a bar chocolate rather than chips for better melting consistency and flavor.
- 1 cup (2 sticks) unsalted butter, softened to room temperature: This is arguably the most important ingredient. It must be truly soft press your finger into it, and it should yield easily. Cold butter will ruin the texture.
- 1 1/2 cups powdered sugar, sifted: Sifting prevents clumps and ensures a truly smooth, “silky” texture.
- 1 teaspoon pure vanilla extract: Enhances the chocolate flavor.
- 2 large eggs (Pasteurized recommended): As discussed, pasteurized eggs are critical for safety since they are not cooked.
- 2 tablespoons cold heavy whipping cream: Helps adjust the final consistency and ensures the filling remains light.
For the Whipped Cream Topping
- 1 cup cold heavy whipping cream: Must be chilled for maximum volume.
- 3 tablespoons powdered sugar, sifted: Sweetens the cream without dissolving its structure.
- 1/2 teaspoon pure vanilla extract: A classic complement to the chocolate flavor.
- Garnish: Chocolate shavings or cocoa powder (optional).
Recommended Tools and Utensils for Recipe Success
The primary tool required for a successful Chocolate Silk Pie Recipe is a robust mixer. Achieving the required light and airy texture requires substantial beating, which is difficult (and tiring) to do by hand.
Key Equipment for the Chocolate Silk Pie
| Utensil | Importance | Notes |
|---|---|---|
| Stand Mixer or Electric Hand Mixer | Critical | The defining feature of this pie is the volume achieved by whipping the butter and eggs. A stand mixer with a paddle attachment is ideal. |
| 9-inch Pie Plate | Necessary | A standard glass or ceramic pie dish works best for even baking of the crust. |
| Sifter or Fine-Mesh Sieve | High | Crucial for sifting powdered sugar to prevent a gritty filling. |
| Rubber Spatula or Offset Spatula | High | Used for scraping down the mixer bowl and smoothing the filling into the crust. |
| Double Boiler or Microwave-Safe Bowl | Necessary | Required for melting the semi-sweet chocolate gently. |
Taking the time to gather and prepare these tools ensures the assembly process for the Chocolate Silk Pie Recipe is smooth and enjoyable. Remember, the softening of the butter and the sifting of the sugar are non-negotiable steps for that true “silk” texture.
Detailed Instructions: Mastering the Chocolate Silk Pie Recipe
Follow these steps precisely, paying close attention to timing and temperature, to create a flawless dessert that will impress every guest.
STEP 1: Prepare and Bake the Graham Cracker Crust
- Preheat your oven to 350°F (175°C). Lightly grease a 9-inch pie plate.
- In a medium bowl, combine the Graham cracker crumbs and the 1/4 cup of granulated sugar. Stir them together thoroughly.
- Pour the 6 tablespoons of melted butter over the crumb mixture. Use a fork or spatula to mix until all crumbs are evenly moistened and resemble wet sand.
- Crucial Tip: Press the crumb mixture firmly and evenly into the bottom and up the sides of the prepared pie plate. Use the bottom of a measuring cup or glass to help compact the crust. A well-compacted crust prevents crumbling when slicing.
- Bake the crust for 8 to 10 minutes, or until it is lightly fragrant and set. Remove the crust from the oven and allow it to cool completely on a wire rack while you prepare the filling. The filling must only be placed in a completely cool crust.
STEP 2: Melt and Cool the Chocolate
- Place the 4 ounces of finely chopped semi-sweet chocolate into a small, heat-proof bowl.
- Melt the chocolate using 30-second intervals in the microwave, stirring well after each interval, until the chocolate is completely smooth. Alternatively, use a double boiler for gentle melting.
- Set the melted chocolate aside and allow it to cool slightly. It must be liquid, but not hot. Introducing hot chocolate into the whipped butter mixture will melt the butter and deflate the filling, resulting in a dense pie.
STEP 3: Create the Airy Butter Base
- In the bowl of a stand mixer fitted with the paddle attachment (or using an electric hand mixer), beat the softened 1 cup of butter on medium-high speed for 3 to 5 full minutes. The butter must transform: it should become very light in color, pale yellow, and significantly fluffy. Stop and scrape down the sides of the bowl often. This step builds the air structure for the entire pie.
- Gradually add the 1 1/2 cups of sifted powdered sugar to the whipped butter, mixing on low speed until combined, then increase the speed to medium-high. Continue beating for another 2 to 3 minutes until the mixture is truly airy and incredibly light.
STEP 4: Whip the Signature Silk Filling
- Reduce the mixer speed to low. Add the vanilla extract.
- The Silk Secret: Add the pasteurized eggs, one at a time. After adding the first egg, beat the mixture for a full 60 seconds before adding the next egg. Repeat this long beating time after the second egg. This aggressive whipping incorporates the necessary air and ensures the texture is impeccably smooth and light this is the magic that defines a perfect Chocolate Silk Pie Recipe.
- Pour in the 2 tablespoons of cold heavy cream and mix until just incorporated.
- Turn the mixer speed to low and slowly drizzle the slightly cooled melted chocolate into the butter and egg mixture. Mix only until the chocolate streaks disappear and the filling is uniform in color. Do not overmix at this stage; overmixing can deflate the air pockets you worked so hard to create. The resulting filling should look thick and fluffy.
STEP 5: Assemble and Chill the Pie
- Carefully spoon the prepared chocolate silk filling into the completely cooled Graham cracker crust. Use an offset spatula to gently smooth the top of the filling, creating an even layer.
- Cover the pie dish loosely with plastic wrap. Ensure the plastic wrap does not touch the surface of the filling, as this can cause condensation marks.
- Refrigerate the pie for a minimum of 4 hours, but preferably overnight, to allow the filling to set completely firm. This patience is vital for achieving clean slices.
STEP 6: Prepare the Topping and Serve
- In a clean, chilled mixing bowl, combine the 1 cup of cold heavy whipping cream, 3 tablespoons of sifted powdered sugar, and 1/2 teaspoon of vanilla extract.
- Whip the ingredients on high speed until stiff peaks form. Watch closely: overbeating turns the cream into butter.
- Just before serving, dollop or pipe the whipped cream topping generously onto the chilled pie.
- Garnish the pie with elegant chocolate shavings or a light dusting of cocoa powder. Store any leftovers tightly covered in the refrigerator.
Tips, Troubleshooting, and Delicious Variations
Even seasoned bakers can encounter minor hurdles with the Chocolate Silk Pie Recipe. Here are the essential tips to ensure success and variations to keep things exciting.
Troubleshooting Common Silk Pie Issues
The Filling is Gritty or Grainy:
This is almost always due to sugar that hasn’t fully dissolved. Ensure you are using powdered sugar (confectioners’ sugar), not granulated sugar. Crucially, sift the powdered sugar before adding it to the butter mixture, and make sure the butter base is beaten for the required 5-8 minutes total before the eggs go in, giving the sugar time to dissolve into the fat.
The Filling is Dense or Deflated:
Two main culprits here: the butter was too cold, or the melted chocolate was too hot. If the butter is cold, it won’t whip properly, and you won’t build the necessary air pockets (Step 3). If the chocolate is hot, it melts the whipped butter, causing the structure to collapse. Always ensure the butter is truly room temperature and the melted chocolate is cool but still liquid.
The Pie Won’t Set:
If you followed the instructions precisely, the pie should set. However, if your kitchen is excessively warm, or if you didn’t measure the butter correctly, it might stay soft. Ensure the pie chills for a minimum of 4 hours, ideally overnight. If necessary, you can try freezing it for an hour before serving for ultimate firmness.
Exciting Variations for the Chocolate Silk Pie Recipe
While the classic Graham cracker crust is superb, switching up the base can provide a delicious twist:
- Oreo Cookie Crust (Chocolate on Chocolate): Replace the Graham cracker crumbs and granulated sugar with 2 cups of finely crushed Oreo cookies (filling included) and reduce the melted butter slightly to 4-5 tablespoons, as the filling adds fat. This creates a deeply intense chocolate experience.
- Nutty Crust: Use crushed walnuts or pecans mixed with shortbread cookies for a sophisticated, crunchy base.
- Coffee Silk Pie: Add 1 teaspoon of instant espresso powder (dissolved in a few drops of water) to the butter base along with the vanilla extract. This deepens the chocolate flavor with a pleasant coffee hint.
- Gluten-Free Option: Easily adapt this recipe by using certified gluten-free Graham crackers or substituting them with a store-bought gluten-free cookie crust. The filling itself is naturally gluten-free.
- Dairy-Free Twist (Challenging): While difficult due to the large amount of butter, you can attempt to use high-quality vegan butter sticks and substitute the heavy cream with full-fat coconut cream (chilled overnight) in both the filling and the topping. Note that the texture may vary slightly.
For those who love rich, creamy desserts but want a non-chocolate option, you might enjoy trying my No-Bake Peanut Butter Pie, a Creamy, Dreamy Dessert, which uses similar chilling principles.
Nutritional Values and Ingredient Benefits
The Chocolate Silk Pie Recipe is an indulgent dessert, best enjoyed in moderation. Due to the high quantities of butter and sugar required to achieve the necessary texture and flavor, it is rich in calories and fats. However, understanding the role of the ingredients can help appreciate the quality of the treat.
A Focus on Fats and Sweetness
One slice of this homemade Chocolate Silk Pie Recipe typically contains between 450 and 600 calories, depending on the serving size and amount of whipped cream used. It is high in saturated and monounsaturated fats, primarily from the butter, which is the cornerstone of the silk filling.
- Fats: Provides essential energy, but should be consumed mindfully. The high fat content is what gives the pie its richness and smooth mouthfeel.
- Carbohydrates/Sugar: This recipe contains a significant amount of simple carbohydrates from the powdered sugar and the small amount of sugar in the crust. This contributes to the sweetness and helps the texture of the filling set when cold.
The Benefits of Quality Chocolate
When you select “good quality semi-sweet chocolate” (4 ounces) for this Chocolate Silk Pie Recipe, you are adding more than just flavor; you are adding beneficial compounds:
Antioxidant Power: Semi-sweet chocolate, particularly those higher in cocoa solid percentage, is rich in antioxidants called flavonoids. These compounds are known to help neutralize free radicals in the body. While a silk pie is not a health food, enjoying high-quality dark chocolate ensures you receive the maximum flavor and a tiny dose of beneficial nutrients.
Mood Enhancement: Chocolate contains compounds like tryptophan and phenylethylamine, which are linked to the production of serotonin a natural mood elevator. In short, there’s a real scientific reason why chocolate makes us happy!
Vitamins and Minerals: Dark chocolate also provides small amounts of essential minerals such as iron, magnesium, copper, and manganese. Using a robust, high-quality chocolate ensures you get more of these trace minerals compared to using standard baking chips with lower cocoa content.
Remember that this decadent dessert is designed to be a treat. By focusing on homemade quality, using pasteurized eggs, and enjoying the Chocolate Silk Pie Recipe in appropriate portion sizes, you can savor every bite without guilt.
Frequently Asked Questions (FAQs) about the Chocolate Silk Pie Recipe
Is the Chocolate Silk Pie Recipe safe to eat since it contains raw eggs?
Safety is paramount, which is why this recipe strongly recommends using pasteurized eggs. Pasteurized eggs have been heat-treated to eliminate bacteria like salmonella, making them safe for consumption in raw or lightly cooked recipes like this chocolate mousse filling. Do not use unpasteurized eggs unless you are comfortable with the inherent risk.
How do I prevent my Chocolate Silk Pie Recipe filling from weeping or separating?
Weeping usually occurs if the butter and sugar mixture was not properly emulsified or if the ingredients were not at the correct temperature. Ensure the butter is truly room temperature and beat the butter/sugar mixture for the full 5-8 minutes until it is very light and fluffy. Also, make sure the melted chocolate is cool before adding it, as hot chocolate will cause the butter base to break down.
Can I freeze the Chocolate Silk Pie for later?
Yes, the Chocolate Silk Pie Recipe freezes quite well. Assemble the pie completely (without the whipped cream topping), cover it tightly with plastic wrap and foil, and freeze for up to 1 month. Thaw the pie overnight in the refrigerator before adding the fresh whipped cream topping and serving. Freezing can slightly alter the texture, but it remains delicious.
What kind of chocolate is best for a silk pie?
Use a good quality semi-sweet chocolate bar, ideally one with a cocoa content between 50% and 60%. Avoid standard chocolate chips, as they contain stabilizers that prevent smooth melting and can result in a less refined texture. Chopping a baking bar finely will ensure it melts smoothly and incorporates perfectly into the whipped base.
Can I use a pre-made crust instead of the Graham cracker crust?
Absolutely! While the homemade Graham cracker crust is recommended for superior flavor and texture, a pre-made baked crust (either Graham cracker or shortbread style) can be used to save time. Ensure the store-bought crust is 9 inches and completely cooled before adding the silk filling.
Conclusion: Your Journey to the Ultimate Chocolate Silk Pie Recipe
The quest for the perfect, most luxurious Chocolate Silk Pie Recipe ends here. This dessert is a true labor of love, requiring patience especially during the crucial chilling stage but rewarding you with a creamy, deeply flavored, and utterly unforgettable dessert. We’ve covered the critical techniques: the 5-minute whipping of the butter base, the long beat time after adding the pasteurized eggs for maximum aeration, and the importance of using cool, melted chocolate to maintain the filling’s delicate structure.
This pie is more than just a sweet treat; it’s a statement. Whether you are serving it for a special occasion or simply treating yourself, the combination of the crisp, spiced Graham cracker crust, the feather-light chocolate mousse, and the homemade vanilla whipped cream is a guaranteed showstopper. The smooth, almost ethereal consistency of the filling truly earns the name “silk.”
We encourage you to gather your ingredients, follow the steps with precision, and experience the unparalleled joy of creating this classic dessert at home. Once you master this recipe, you will never need another. Did you try this Chocolate Silk Pie Recipe? What did you think of the silky texture? Share your experience and any successful variations in the comments below. Happy baking and even happier eating!

Classic No-Bake Chocolate Silk Pie with Graham Cracker Crust
Ingredients
Equipment
Method
- Preheat your oven to 350°F (175°C). Lightly grease a 9-inch pie plate.
- In a medium bowl, combine the Graham cracker crumbs and the 1/4 cup of granulated sugar. Stir them together thoroughly.
- Pour the 6 tablespoons of melted butter over the crumb mixture. Use a fork or spatula to mix until all crumbs are evenly moistened and resemble wet sand.
- Press the crumb mixture firmly and evenly into the bottom and up the sides of the prepared pie plate. Use the bottom of a measuring cup or glass to help compact the crust.
- Bake the crust for 8 to 10 minutes, or until it is lightly fragrant and set. Remove the crust from the oven and allow it to cool completely on a wire rack while you prepare the filling.
- Place the 4 ounces of finely chopped semi-sweet chocolate into a small, heat-proof bowl.
- Microwave the chocolate in 30-second intervals, stirring well after each interval, until the chocolate is completely smooth and melted. Set the melted chocolate aside and allow it to cool slightly, ensuring it remains liquid but is not hot to the touch.
- In the bowl of a stand mixer fitted with the paddle attachment (or using an electric hand mixer), beat the softened 1 cup of butter on medium-high speed for 3 to 5 minutes. The butter should become very light in color, pale yellow, and significantly fluffy. Scrape down the sides of the bowl as needed.
- Gradually add the 1 1/2 cups of sifted powdered sugar to the whipped butter, mixing on low speed until combined, then increase the speed to medium-high. Continue beating for another 2 to 3 minutes until the mixture is airy and incredibly light.
- Reduce the mixer speed to low. Add the vanilla extract.
- Add the pasteurized eggs, one at a time, beating for a full 1 minute after each addition. This long beating time is crucial for incorporating enough air to achieve the signature light, fluffy, and silky texture of the pie.
- Pour in the 2 tablespoons of cold heavy cream and mix until just incorporated.
- Turn the mixer speed to low and slowly drizzle the slightly cooled melted chocolate into the butter and egg mixture. Mix only until the chocolate streaks disappear and the filling is uniform in color, avoiding overmixing.
- Carefully spoon the prepared chocolate silk filling into the completely cooled Graham cracker crust. Use an offset spatula to smooth the top of the filling, creating an even layer.
- Cover the pie dish loosely with plastic wrap. Refrigerate the pie for a minimum of 4 hours, but preferably overnight, to allow the filling to set completely firm.
- In a clean, chilled mixing bowl, combine the 1 cup of cold heavy whipping cream, 3 tablespoons of sifted powdered sugar, and 1/2 teaspoon of vanilla extract.
- Whip the ingredients on high speed until stiff peaks form. Be careful not to overbeat.
- Just before serving, dollop or pipe the whipped cream topping generously onto the chilled pie.
- Garnish the pie with chocolate shavings or a light dusting of cocoa powder. Store any leftovers tightly covered in the refrigerator.