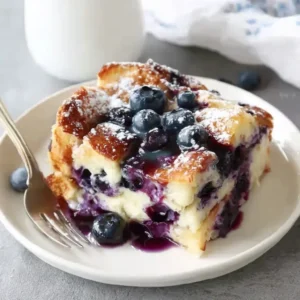
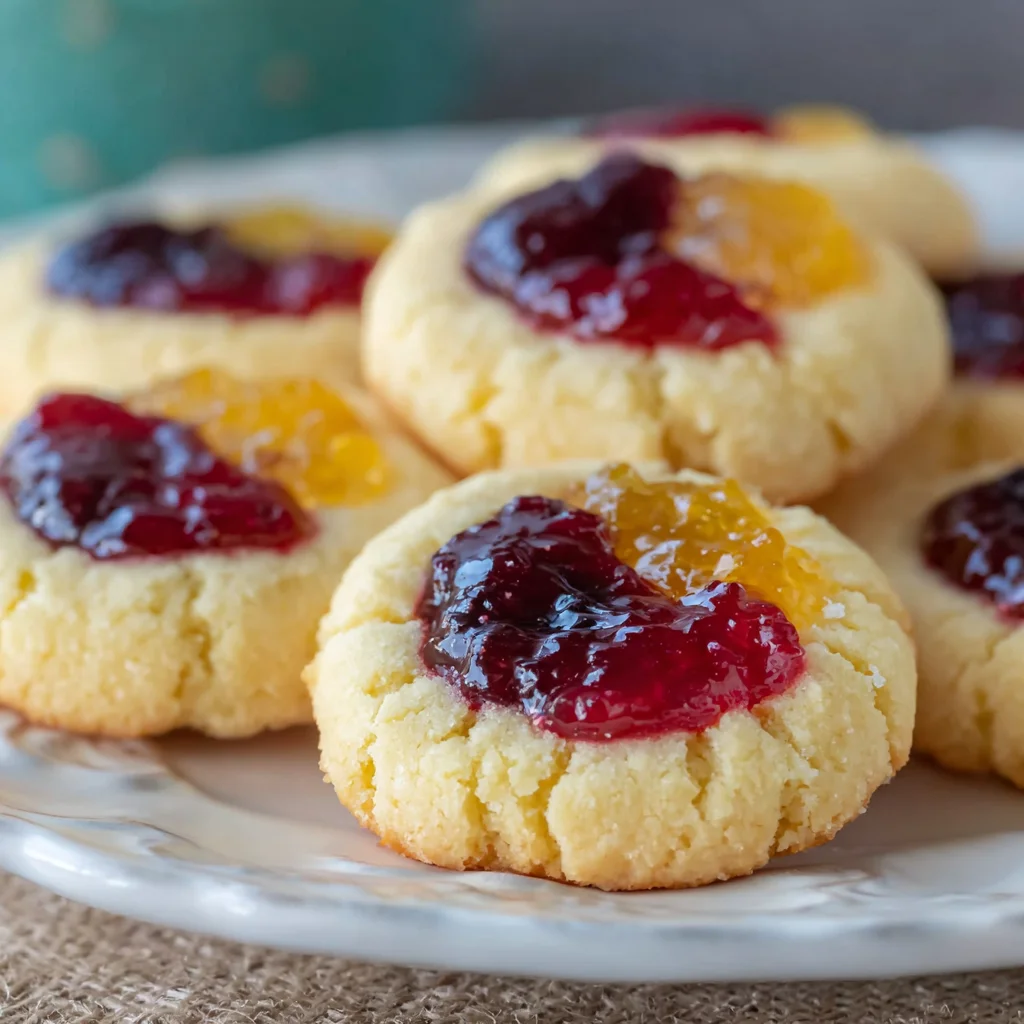
The aroma of warm, buttery cookies baking in the oven is a quintessential part of the Christmas season. And what better cookie to evoke that festive feeling than a batch of perfectly golden-brown Christmas Thumbprint Cookies? These delightful treats, with their delicate buttery crust and sweet, jewel-toned jam centers, are not only incredibly delicious but also incredibly easy to make. Whether you’re a seasoned baker or a kitchen novice, this recipe will guide you to create a stunning and delicious addition to your holiday cookie platter. Imagine the smiles on your loved ones’ faces as they bite into these festive delights, each perfectly formed thumbprint a testament to your love and care. This year, ditch the store-bought cookies and embrace the joy of homemade goodness. This Christmas Thumbprint Cookies recipe is your ticket to a truly memorable holiday season.
Why You’ll Love This Christmas Thumbprint Cookies Recipe
This Christmas Thumbprint Cookies recipe is more than just a collection of ingredients and instructions; it’s an experience. It’s the fragrant warmth of your kitchen filled with the sweet scent of baking cookies, the satisfying feel of shaping the dough, and the joyous anticipation of sharing the finished product with those you cherish. There’s something truly magical about baking homemade cookies during the holidays, and this recipe makes it accessible to everyone.
Firstly, the recipe is incredibly forgiving. Even if your butter isn’t perfectly softened, or your measurements are slightly off, these cookies will still turn out beautifully. The simple dough comes together quickly, making it perfect for busy holiday schedules. Secondly, the customization options are endless! Feel free to experiment with different types of jam – from classic raspberry and strawberry to more adventurous flavors like apricot, blackberry, or even fig. You can also add a sprinkle of festive spices like cinnamon or nutmeg to the dough for an extra layer of warmth and flavor. Thirdly, the presentation is simply stunning. The perfectly round cookies with their deep thumbprints filled with vibrant jam are visually appealing, adding a touch of elegance to any Christmas gathering. And finally, these cookies are incredibly delicious! The melt-in-your-mouth buttery texture combined with the sweet tang of the jam creates a flavor combination that’s hard to resist. They’re the perfect balance of sweet and tart, making them a crowd-pleasing treat for all ages.
Why You Should Try This Christmas Thumbprint Cookies Recipe
Beyond their deliciousness and ease of preparation, these Christmas Thumbprint Cookies offer a unique opportunity for connection and tradition. Baking these cookies can become a cherished family activity, creating lasting memories that will be treasured for years to come. Imagine gathering around the kitchen table with loved ones, rolling out the dough, and creating those iconic thumbprints together. The simple act of baking can be a powerful way to connect with family and friends, fostering a sense of togetherness and shared purpose during the busy holiday season.
Furthermore, these cookies are perfect for gifting. Their beautiful appearance and delicious taste make them a thoughtful and personalized present for friends, family, neighbors, or teachers. Package them in festive tins or bags, and add a personalized tag for an extra special touch. These cookies are also a great way to showcase your baking skills and creativity without overwhelming yourself with complex recipes. And let’s not forget the versatility – they’re equally delightful served alongside a cup of hot cocoa on a chilly Christmas evening, or as a sweet treat after a festive meal. Whether you are looking for a simple dessert for a small gathering or a beautiful treat to share with a crowd, this Christmas Thumbprint Cookies recipe delivers on both fronts. So, why not give it a try this holiday season and make some magical memories in your kitchen?
Ingredients and Necessary Utensils for Christmas Thumbprint Cookies
Gathering the right ingredients and tools is the first step to baking success. Having everything prepared beforehand will make the process smoother and more enjoyable. This section provides a detailed list of ingredients and recommended utensils, ensuring you have everything you need to create perfect Christmas Thumbprint Cookies.
Ingredients: A Detailed Look
- 1 cup (2 sticks) unsalted butter, softened: The foundation of these cookies’ delicious texture. Make sure your butter is softened to room temperature for easy creaming. Using unsalted butter allows you to control the saltiness of your cookies. Find more recipes using butter here!
- 1 cup granulated sugar: Provides sweetness and helps create a tender crumb. You can experiment with different types of sugar, like brown sugar, for a different flavor profile.
- 1 large egg: Acts as a binder, adding moisture and richness to the dough. Ensure your egg is at room temperature for optimal incorporation.
- 1 teaspoon vanilla extract: Enhances the flavor and adds a warm aroma to the cookies. Consider using other extracts like almond or peppermint for a festive twist.
- 2 1/4 cups all-purpose flour: Gives structure to the cookies. Make sure to sift your flour for a light and airy texture. Consider substituting with gluten-free flour blend for those with dietary restrictions.
- 1/2 teaspoon baking powder: Helps the cookies rise slightly and creates a tender texture. Check the expiration date to ensure its effectiveness.
- 1/4 teaspoon salt: Balances the sweetness and enhances the overall flavor. A pinch more or less depending on your preference for saltiness.
- 1/2 cup raspberry jam (or your favorite jam): The star of the show! Choose your favorite jam for a personalized touch. Seedless jams are generally preferred for a smoother texture.
- 1/2 cup powdered sugar, for dusting: Adds a beautiful finishing touch and enhances the sweetness. Use a fine-mesh sieve for even dusting.
Utensils: The Tools of the Trade
- Large bowl: For creaming the butter and sugar, and mixing the wet and dry ingredients.
- Electric mixer (handheld or stand): Makes creaming the butter and sugar much easier and faster. If using a stand mixer, use the paddle attachment.
- Measuring cups and spoons: For accurate measurement of ingredients.
- Whisk: For whisking together the dry ingredients.
- Rubber spatula or wooden spoon: For combining the wet and dry ingredients and scraping down the sides of the bowl.
- Baking sheets: At least two are recommended for optimal baking.
- Parchment paper: Prevents the cookies from sticking to the baking sheets. Provides easy cleanup.
- Measuring spoons: For accurate measuring of smaller ingredients like baking powder and salt.
- Cookie scoop (optional): Ensures uniform cookie size and easier handling.
- Fine-mesh sieve: For evenly dusting powdered sugar onto the cooled cookies.
- Wire rack: For cooling the cookies completely after baking. Allows for even cooling and prevents moisture build-up.
Detailed Recipe Steps for Christmas Thumbprint Cookies
Follow these detailed instructions for perfectly baked Christmas Thumbprint Cookies. Remember, precision and attention to detail are key elements for successful baking.
- Preheat your oven to 350°F (175°C): This ensures that your cookies bake evenly and achieve the perfect golden-brown color. Give your oven ample time to reach the desired temperature before placing your cookies in.
- Line your baking sheets with parchment paper: This crucial step prevents sticking and makes cleanup a breeze. Ensure the parchment paper covers the entire baking sheet.
- Cream together the butter and sugar: In your large bowl, cream together the softened butter and granulated sugar until the mixture is light and fluffy. This step is crucial for creating a tender crumb. Use your electric mixer for best results. **Creaming incorporates air into the mixture, resulting in lighter and fluffier cookies.**
- Add the egg and vanilla: Beat in the egg and vanilla extract until well combined. **Make sure to scrape down the sides of the bowl to ensure all ingredients are incorporated.**
- Combine the dry ingredients: In a separate bowl, whisk together the flour, baking powder, and salt. **Sift the flour for a lighter texture.**
- Gradually add the dry ingredients to the wet ingredients: Gradually add the dry ingredients to the wet ingredients, mixing on low speed until just combined. **Be careful not to overmix the dough, as this can result in tough cookies.**
- Shape the cookies: Roll the dough into 1-inch balls. Use a cookie scoop for uniform size. Place the balls onto the prepared baking sheets, leaving about 2 inches between each cookie. **This spacing allows the cookies to spread out while baking.**
- Make the thumbprints: Use your thumb to make a deep indentation in the center of each cookie. **The indentation should be deep enough to hold the jam without overflowing.**
- Fill with jam: Fill each indentation with about 1/2 teaspoon of your chosen jam. **Don’t overfill the thumbprints; a little goes a long way.**
- Bake for 10-12 minutes: Bake until the edges are lightly golden brown. Keep a close eye on your cookies, as oven temperatures can vary. **Start checking for doneness at 10 minutes.**
- Cool the cookies: Let the cookies cool on the baking sheets for a few minutes before transferring them to a wire rack to cool completely. **Cooling on the baking sheets for a few minutes prevents breakage.**
- Dust with powdered sugar: Once the cookies are completely cool, dust them with powdered sugar using a fine-mesh sieve.
Tips and Variations for Christmas Thumbprint Cookies
Experimenting with this recipe is half the fun! Try these variations and tips for creating unique and delicious Christmas Thumbprint Cookies.
- Jam Alternatives: Explore a world of flavors beyond raspberry! Try using strawberry, blackberry, apricot, cherry, or even a festive cranberry sauce. Consider using different jam flavors for a colorful cookie platter.
- Spice it Up: Add a dash of cinnamon, nutmeg, or even ginger to the cookie dough for a warm, comforting flavor. A pinch of cardamom can add a festive touch.
- Citrus Zest: Incorporate a teaspoon of lemon or orange zest into the dough for a bright, refreshing flavor. It complements the sweetness of the jam beautifully.
- Chocolate Swirl: For a decadent twist, add melted chocolate chips or chunks to the dough before baking. It’s a delicious way to add a touch of festive chocolate to your cookies.
- Nut Additions: Chopped pecans, walnuts, or almonds can add texture and flavor. Be sure to use freshly chopped nuts for optimal flavor and texture.
- Gluten-Free Option: Substitute all-purpose flour with a high-quality gluten-free blend. You might need to adjust the amount of flour slightly depending on the brand you use.
- Vegan Option: Replace the butter with a vegan butter substitute and the egg with a flax egg (1 tablespoon ground flaxseed meal mixed with 3 tablespoons water).
- Avoiding Common Mistakes: Overmixing the dough will lead to tough cookies. Be sure to mix just until combined. Don’t overbake; slightly underbaked cookies are softer and more delicious.
Nutritional Values and Benefits of Christmas Thumbprint Cookies
While Christmas Thumbprint Cookies are undeniably indulgent, let’s explore the nutritional aspects and the benefits of the key ingredients.
Approximate Nutritional Information (per cookie): These values are estimates and may vary depending on specific ingredients used.
- Calories: 150-200
- Fat: 8-10g
- Saturated Fat: 5-7g
- Carbohydrates: 20-25g
- Sugar: 12-15g
- Protein: 2-3g
Benefits of Key Ingredients:
- Butter: Provides richness and flavor, as well as fat-soluble vitamins.
- Eggs: Good source of protein and essential nutrients. Contributes to the structure and binding of the cookies.
- Flour: Provides carbohydrates for energy.
- Jam: Offers antioxidants from the fruits, particularly if you use homemade jam or jams high in fruit content.
Remember that these cookies are best enjoyed in moderation as part of a balanced diet. They’re a festive treat, not a daily staple.
FAQs about Christmas Thumbprint Cookies
FAQs
Can I make these cookies ahead of time?
Yes, you can bake the cookies a day or two in advance and store them in an airtight container at room temperature. The jam filling will keep them moist.
What type of jam works best in Christmas Thumbprint Cookies?
Almost any jam works! Raspberry, strawberry, and apricot are classics, but you can get creative with your choice. Seedless jams are generally preferred for a cleaner look.
How can I prevent my Christmas Thumbprint Cookies from spreading too much during baking?
Chill the cookie dough for at least 30 minutes before baking. This will firm up the butter and prevent excessive spreading. Also, don’t overcrowd the baking sheet.
These Christmas Thumbprint Cookies are a delightful addition to any holiday celebration. Their ease of preparation, beautiful presentation, and delicious flavor make them a perfect choice for baking with family and friends. Don’t forget to share your baking creations on social media and tag us! We would love to see your beautiful Christmas Thumbprint Cookies. Happy baking! And for more festive recipes, be sure to check out our Christmas Gooey Butter Cookies recipe. For other delightful treats, check out our collection of autumn recipes on our website.
Feel free to share your experience with this recipe in the comments below. Don’t hesitate to ask any questions you might have. We hope you enjoy these delicious Christmas Thumbprint Cookies as much as we do! And don’t forget to share this recipe with your friends and family – the joy of baking is best shared!

Christmas Thumbprint Cookies
Ingredients
Equipment
Method
- Preheat oven to 350°F (175°C). Line baking sheets with parchment paper.
- Cream together the softened butter and granulated sugar until light and fluffy using an electric mixer.
- Beat in the egg and vanilla extract until well combined.
- In a separate bowl, whisk together the flour, baking powder, and salt. Gradually add the dry ingredients to the wet ingredients, mixing until just combined. Do not overmix.
- Roll the dough into 1-inch balls. Place the balls onto the prepared baking sheets, leaving about 2 inches between each cookie.
- Use your thumb to make a deep indentation in the center of each cookie to hold the jam.
- Fill each indentation with about 1/2 teaspoon of raspberry jam.
- Bake for 10-12 minutes, or until the edges are lightly golden brown. Let cool on baking sheets for a few minutes before transferring to a wire rack to cool completely.
- Once completely cool, dust with powdered sugar.